

How To Add Tabs To Wordpress Blog
How To Add Tabs To WordPress Posts and Pages
Last updated on:
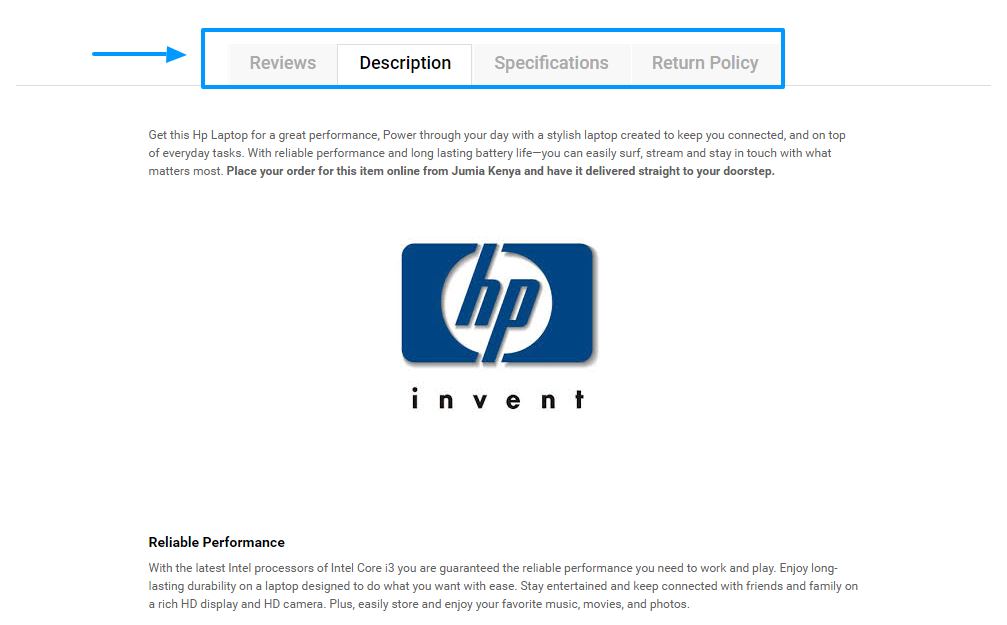
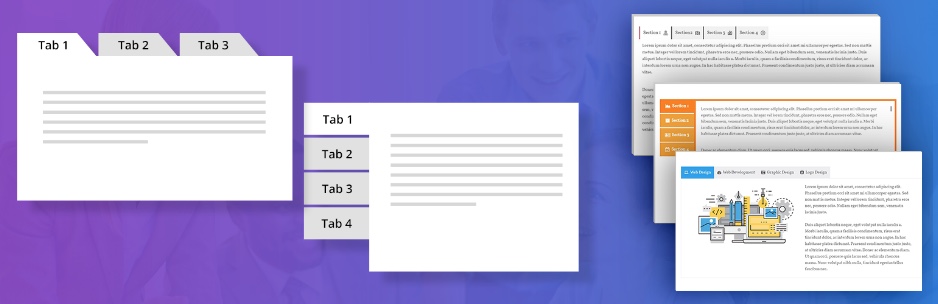
Tabs are a fairly common feature on many websites, especially e-commerce stores. E-commerce store owners usually use tabs in the product description area, where they split reviews, description, technical specs and so on into multiple tabs.
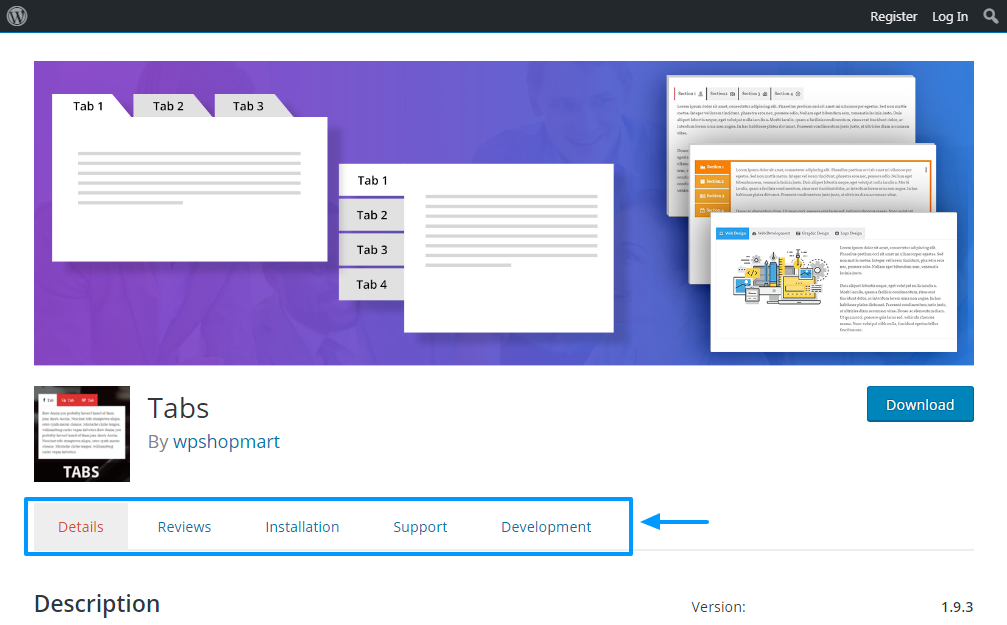
Still, tabs have found use in many other different types of websites, not just e-commerce websites. Even the official WordPress.org website uses tabs on plugin description pages. See image below to see the highlighted tabs at WP.org.
Many other website owners use tabs on different types of websites. However, tabs are not to be confused with accordions, which expand to reveal information. Below, please observe how I have used accordions on my website.

But accordions aside, we are here to talk abouttabs, so let us not lose our focus; I just needed to make the distinction between tabs and accordions clear. Now, I hope we are on the same page 🙂
In essence, web owners use tabs to split information that would have otherwise taken a full page or post. That means that tabs make information much easier to digest, without necessarily forcing users to hit the scroll wheel a million times.
In other words, tabs improve the usability of your website especially in a world of shorter attention spans. So, if you'd like to keep users on your site for longer without boring them to death with long pages, you should consider using tabs.
In today's post, we show you exactly how to add tabs to your WordPress posts and pages. Before the end of this post, you will have all the instructions you need to use tabs to your advantage. We hope you enjoy to the very end, and please don't leave without sharing your thoughts in the comment section. That out of the way, let's get started.
Use a Page Builder
If you already have a page builder installed you're in luck – you likely already have a tabs module at your finger tips. Most of the major page builders offer tabs as a part of their core set of page builder elements. Here's a quick look at two of our favorites.
Elementor Free Page Builder
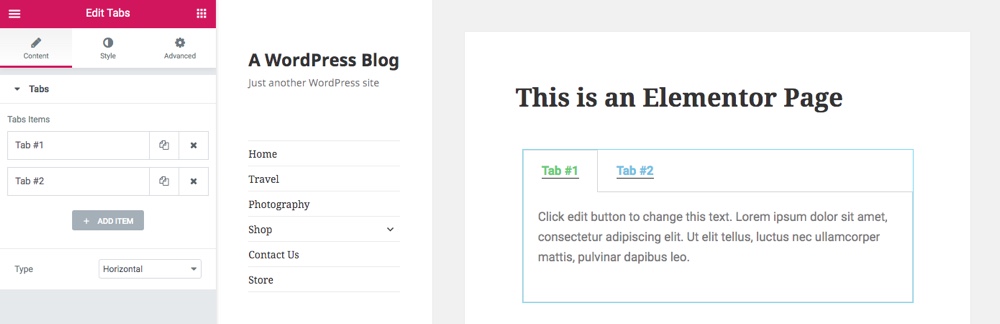
The popular Elementor page builder includes tabs as a part of the free version of the plugin. All you need to do is insert a tab element on your page, then edit the title, content, style, etc. That's it!
WPBakery Premium Page Builder
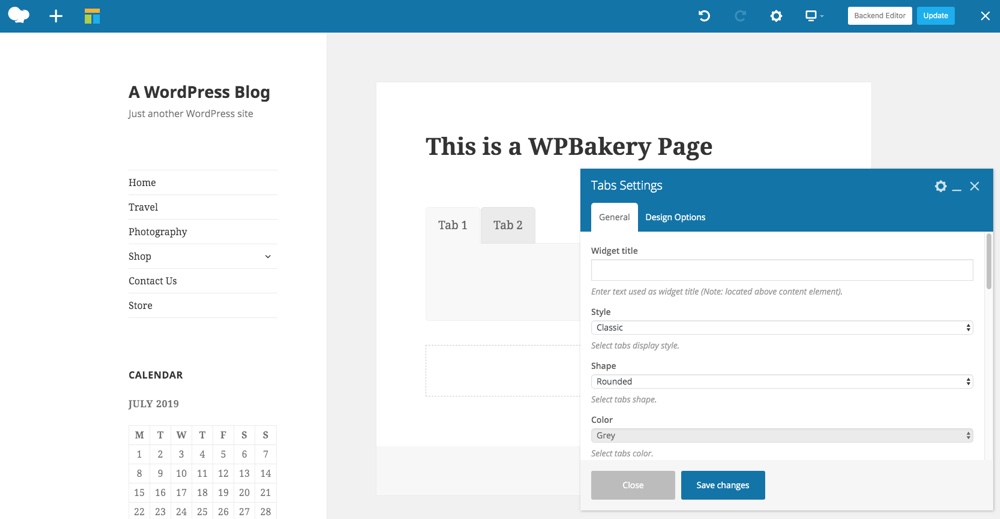
Using a premium theme that includes the WPBakery Page Builder (such as our own Total theme)? Great! Tabs are built-in and easy to use.
The WPBakery tab module is slightly different from the previous example as the tabs are initially empty when you add them. You'll need to insert additional page elements (text area, images, icons, etc) within the tabs to add your content. But this gives you a ton of freedom to create tabs how you want them (in addition to the built-in styling options). We've covered this page builder on the blog before, so if you'd like more detailed instructions checkout our WPBakery guide (note – this plugin was previously called Visual Composer, so sorry in advance for any confusion).
Install the Tabs WordPress Plugin
If you're not using a page builder, there's no need to use one just for tabs. There are plenty of great alternatives, like the free WordPress plugin known simply as Tabs by WP Shop Mart. Tabs is a nifty WordPress plugin that helps you to create an unlimited number of beautiful tabs without breaking a sweat.
Let's start by installing the Tabs WordPress plugin. Since it is available in the official WordPress plugin repo, you can install the plugin directly from inside your WordPress admin dashboard.
We are using the free version, but there is a premium version available if you'd like to upgrade for extra features later on.
Installing Tabs WordPress Plugin
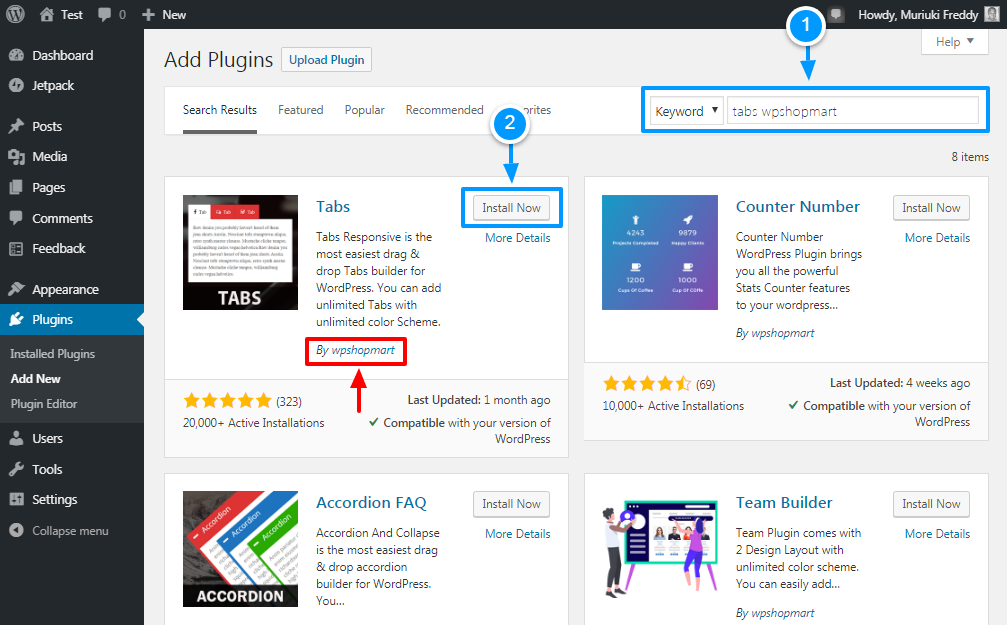
Login to your WordPress admin dashboard and navigate toPlugins > Add New and enter "tabs wpshopmart" into the keyword search box. Once you find the right plugin, hit the Install Now button as shown below.
After that, click theActivate button. And that's it, your Tabs Responsive WordPress plugin is ready to use. Now, let us create a couple of tabs to discover what this plugin has to offer.
Configure the Tabs Responsive WordPress Plugin
Activating the plugin will add a new item to your WordPress admin menu. To create new tabs, navigate to Tabs Responsive > Add New Tabs as we detail in the screengrab below.

Doing so leads you to the Tabs Responsive Builder that's chockfull of all the features you need to create beautiful tabs like a boss. See the image below for a glimpse of what to expect.
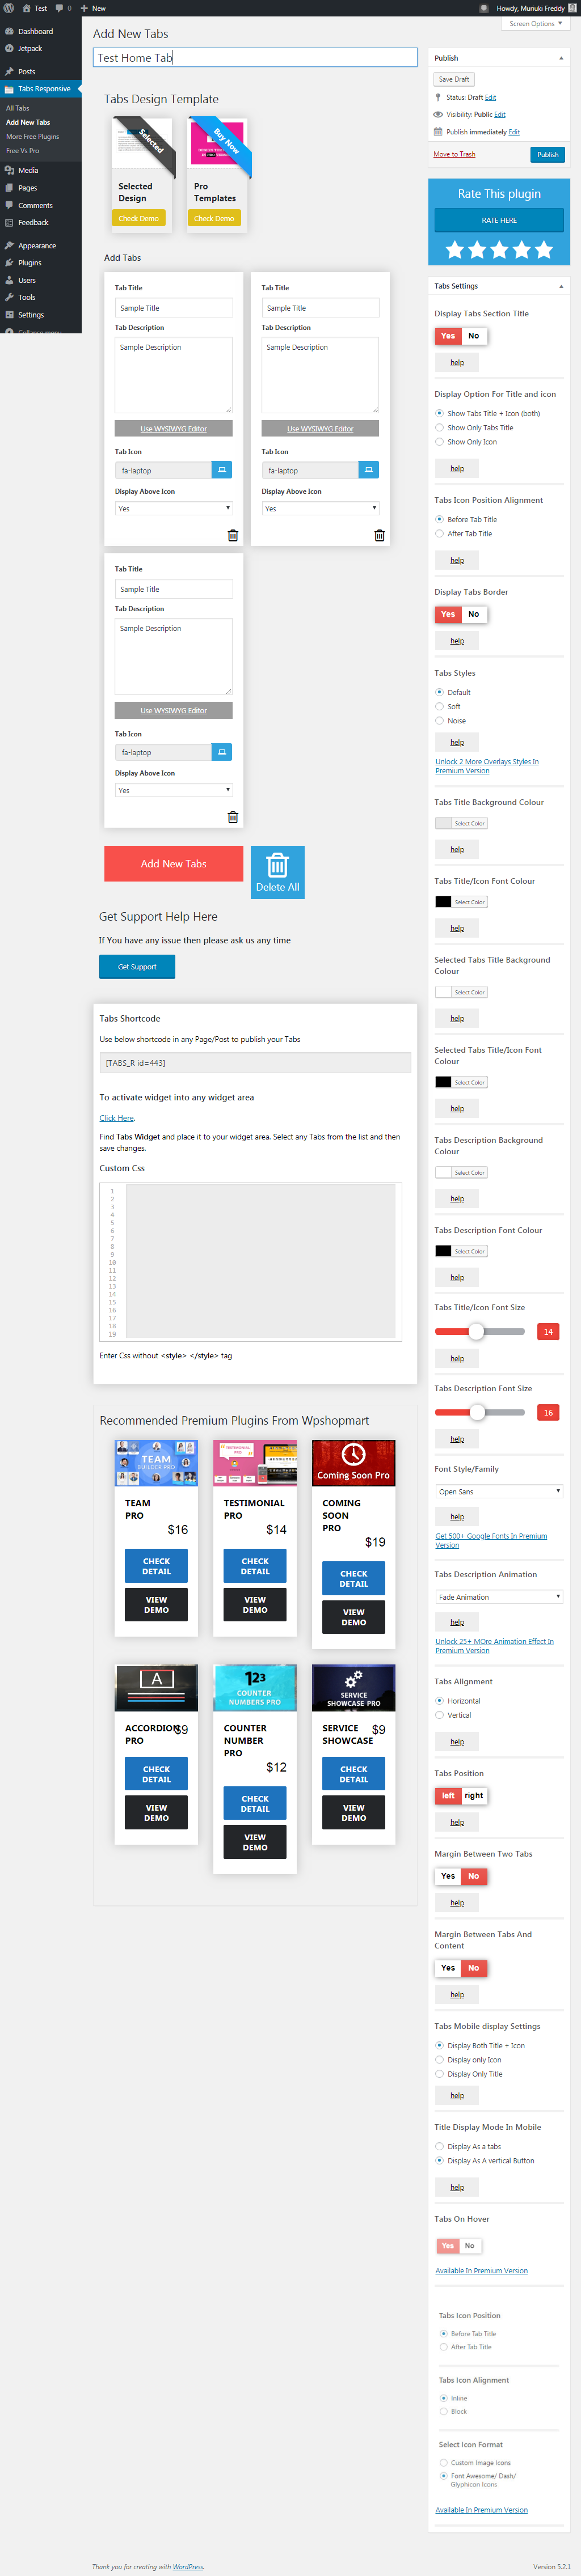
Quite a scroll ain't it? Well, you can find most of the features on the right sidebar. Note, also, that individual tabs have their settings. You can even use WYSIWYG editors on the tabs, meaning you have plenty of control over your tabs.
Now, let us create a couple of sample tabs, and display them on a page or post.
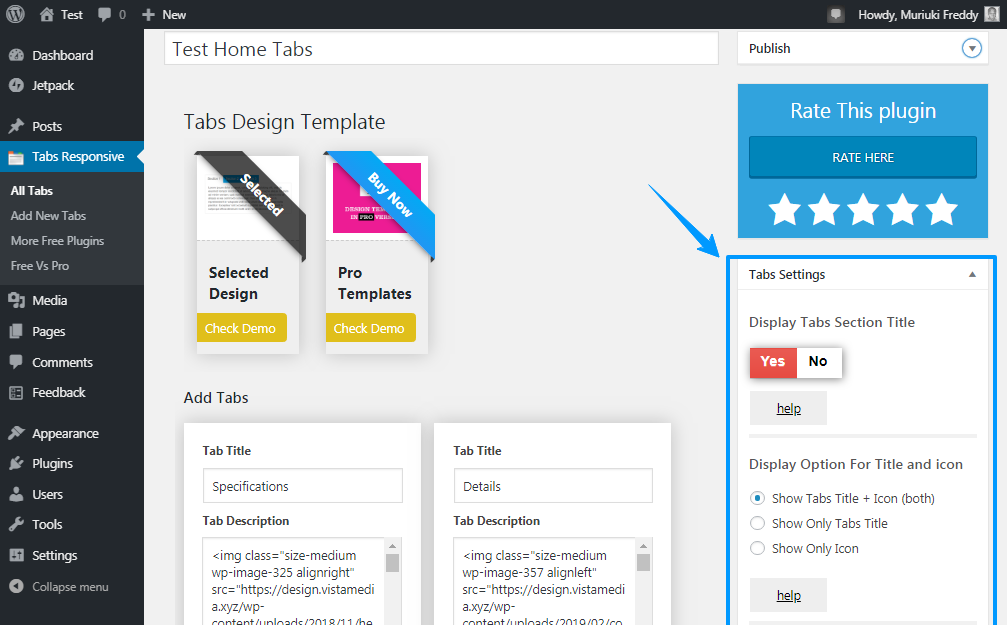
Add Title
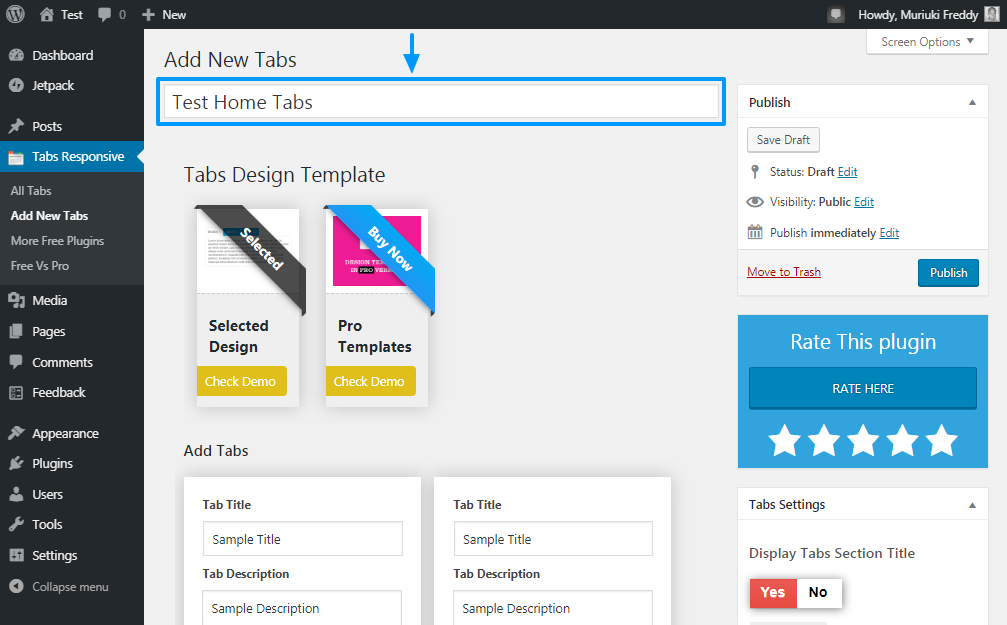
Start by giving your tabs a descriptive title (just like do with your navigation menus) as shown in the image above. This way, you can easily identify your tabs in the WordPress admin dashboard later on in case you need to edit anything. For the purposes of this tutorial, I christened my tabs "Test Home Tabs."
Choose Tabs Design Template
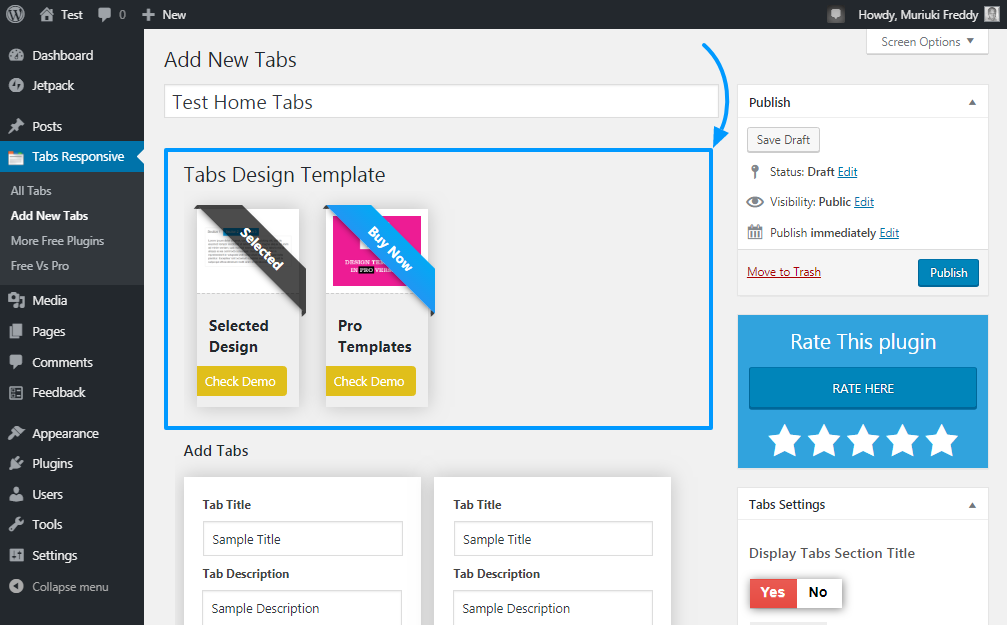
As seen in the screenshot above, your next step involves choosing a design template that you'd like to use for your tabs. The free version of the Tabs WordPress plugin offers you only one design template, but you can always upgrade to the premium version for 19 more. Talk of design freedom.
Add Tabs
Next, add as many tabs as you desire as shown below.
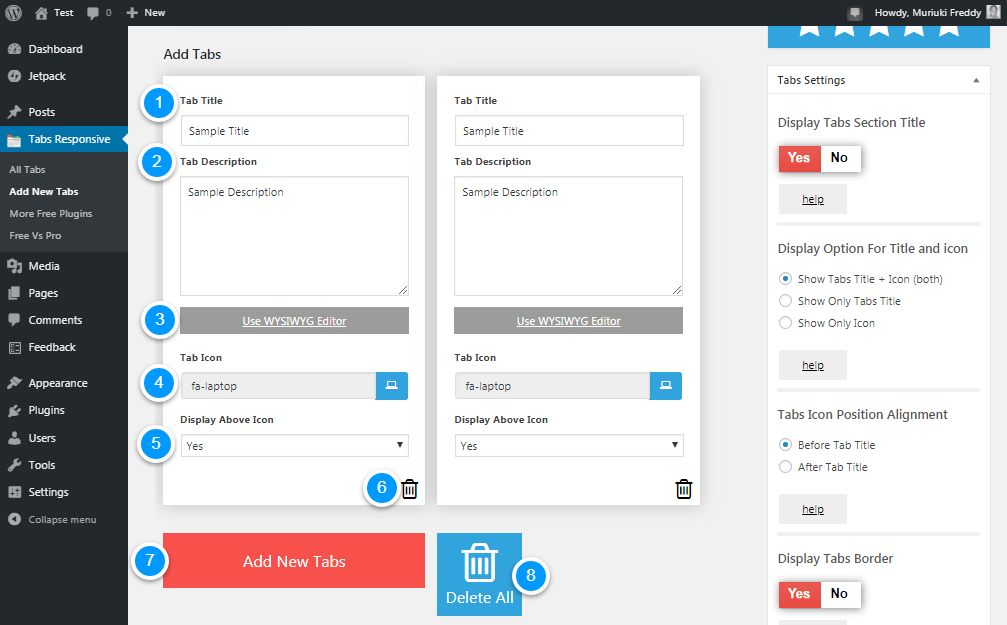
We have created a numbered list detailing what you can do on theAdd Tabs section shown above. Numbers correspond to each area.
- Tab Title– Add your tab title in this field e.g.Description, Specifications, Details, etc.
- Tab Description – Add your tab description here. This field allows you to add the content of your tab. The best part is you can use the WYSIWYG editor (shown in number 3 below) to add rich content to your tabs, including images, music, and videos
- Use WYSIWYG – If you'd like to use the familiarWhat-You-See-Is-What-You-Get editor to create your tab content, feel free to hit this button to launch the pop-up window
- Tab Icon – This field helps you to choose an icon to use on your tab. The Tabs WordPress plugin offers you access to tons of Font Awesome icons to jazz up your tabs like a pro
- Display Above Icon – If you'd like to display the tab title alongside the icon, you will love this feature. Further, it allows you to disable the icon without touching the tab title
- Delete – Hit this button to delete a specific tab
- Add New Tabs – Click on this button to add more tabs
- Delete All – Tired of all tabs? Just hit theDelete All button to reset everything
A couple bonus tips to help you out. First, you can drag and drop the tabs around to reorder and arrange them as you desire.
Second – don't forget to hit the Save Draft button once or twice as you create your tabs to ensure you don't lose any changes in case you navigate away from the tabs builder by accident.
Lastly – if you need support there is a big blue Get Support button just below the Add Tabs section (and on most of the plugin's pages) that leads you to the official Tabs support forum at WordPress.org. Don't hesitate to hit the support button if you need help at any time.
Tabs Shortcode
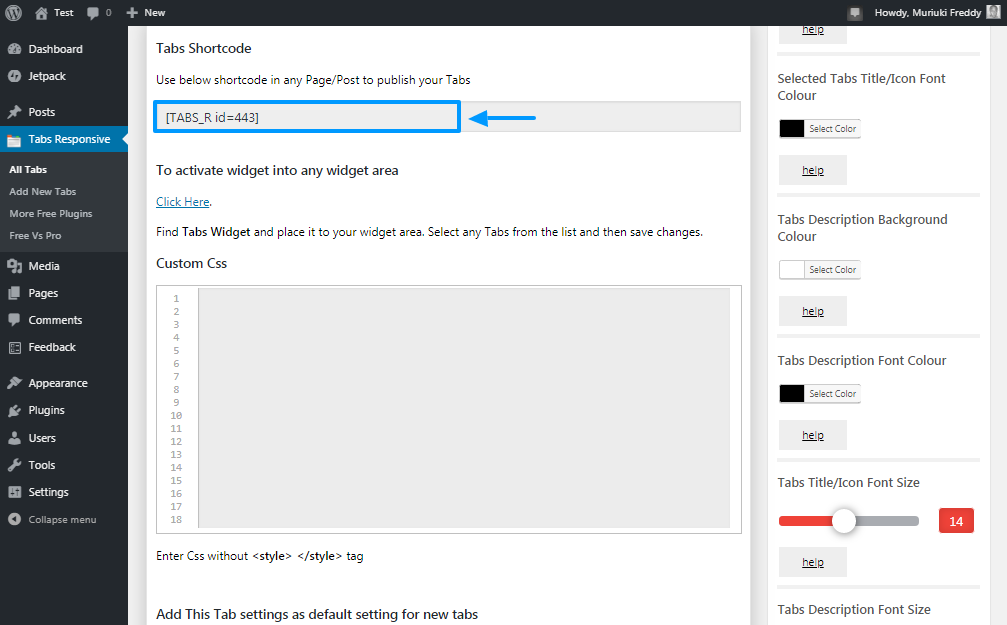
Next, you find the Tabs shortcode that you use to add and display your tabs on any page or post you desire. For instance, our shortcode is [TABS_R id=443]. To display the tabs on a page, I would simply copy-paste the above shortcode into that particular page.
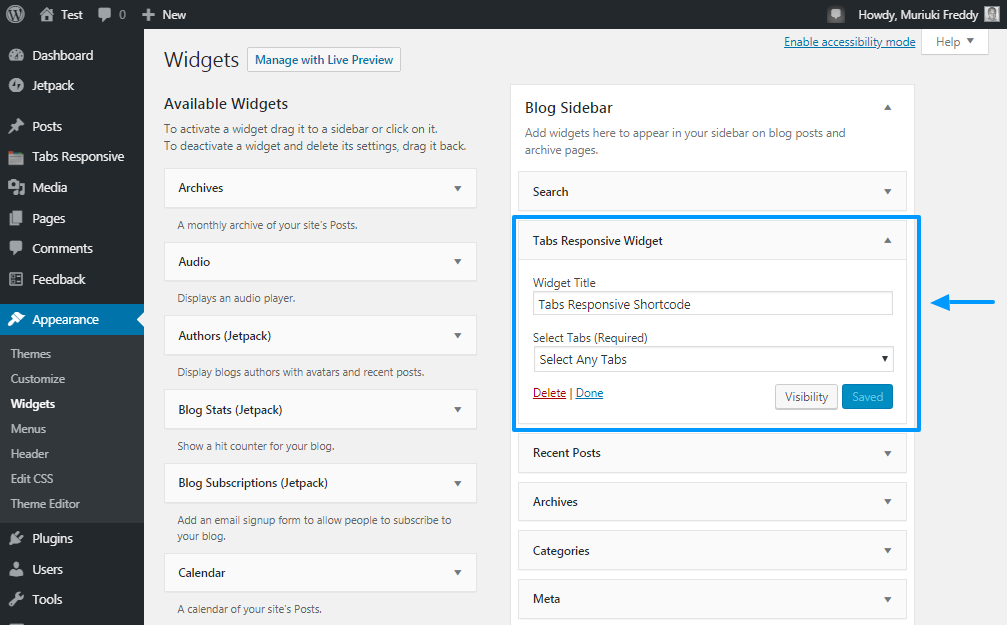
Tabs Widget
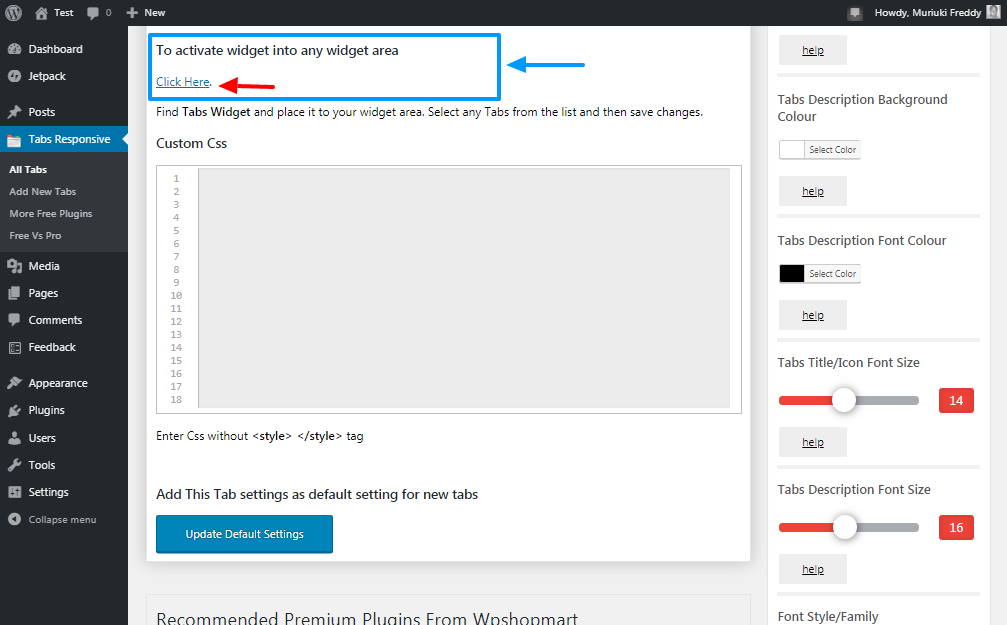
Are you looking to add your tabs into a widget area on your website? If that's a resounding yes, you will love the widget support that comes with the Tabs WordPress plugin.
Hitting theClick Here link in the image above takes you to the WordPress widgets screen, where you're free to add your tabs anywhere you have a widget area in your theme.
Custom CSS
While the Tabs WordPress plugin comes with plenty of tab customization options (just glance at that right sidebar; it's full of styling options!), you can add your own custom CSS styles as shown below.
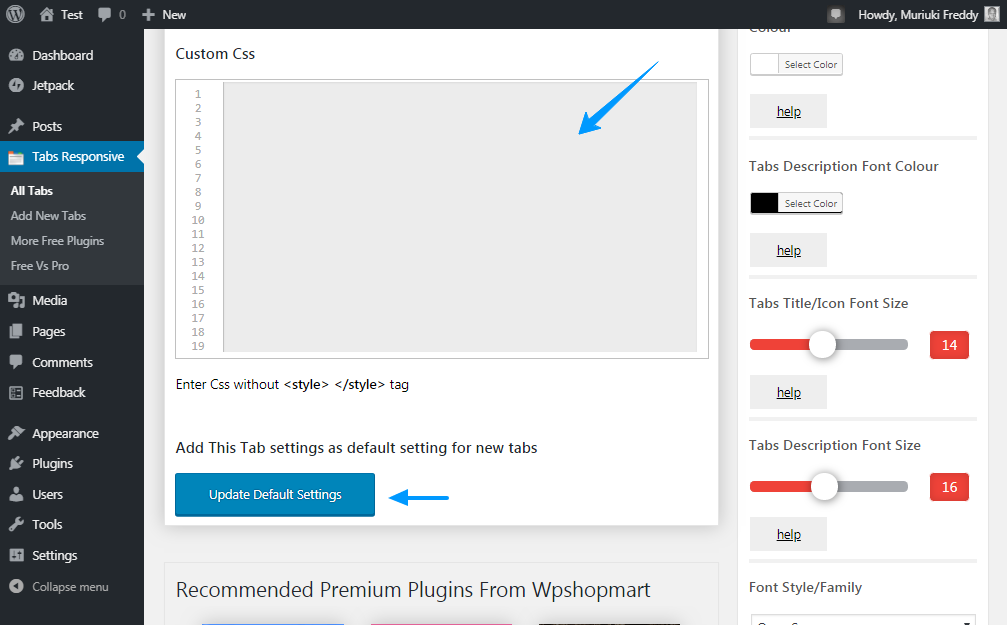
Further, you can set your custom settings as the default settings for all new tabs simply by clicking the Update Default Settings button as shown in the image above.
The Right Sidebar
The right sidebar we highlight in the image above carries the day for yours truly. It's is packed with all the options you need to style your tabs to your heart's content. Notable options include:
- Tab background color
- Tab font color
- Font family and style
- Display options for tab title and icon
- Tab icon position alignment i.e., before or after tab title
- Tab borders
- Multiple tab description animations
- And so much more
Add Your Tabs to a WordPress Page or Post
Once you add your tab content and style options, scroll up and click the Publish button as shown below.

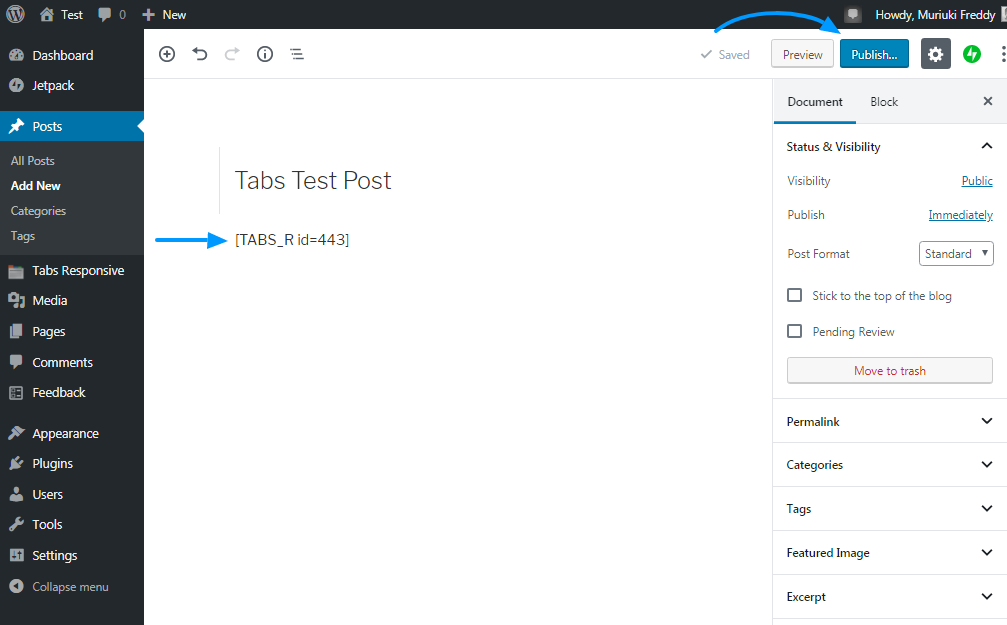
At this point, your tabs are ready. You simply need to add the tabs to a WordPress page or post. Simply copy the tabs shortcode we saw earlier. Ours is [TABS_R id=443].
Launch your post editor (even if you're using Gutenberg) and paste the shortcode into your post/page. After that, hit thePublish button as shown below.
After about 5 minutes of setting up things; I'm using the Twenty Seventeen theme and plenty of Lorem Ipsum, I came up with the following result.
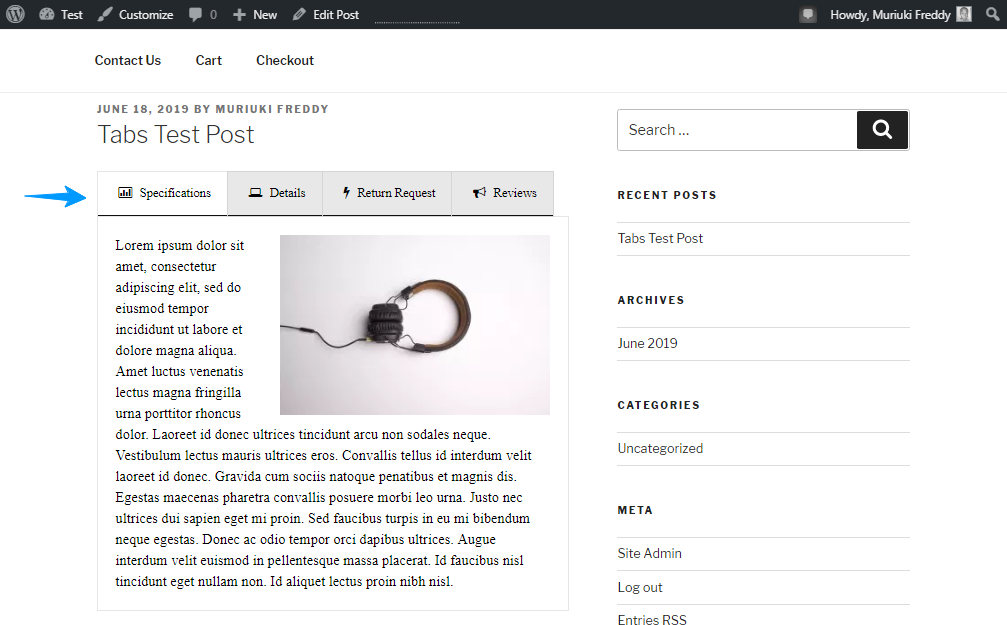
Note that I didn't customize the colors or anything. Tell me what you think; wasn't that easy?
Adding tabs to your WordPress pages and posts is the stuff of fourth graders. I don't expect you to run into any problems, especially if you're using a plugin such as Tabs by WP Shop Mart.
How do you add tabs to your WordPress pages and posts? Which is your favorite tabs WordPress plugin? Please share your thoughts in the comments. Happy creating!
How To Add Tabs To Wordpress Blog
Source: https://www.wpexplorer.com/add-tabs-wordpress/
Posted by: riddlejoincte.blogspot.com
0 Response to "How To Add Tabs To Wordpress Blog"
Post a Comment